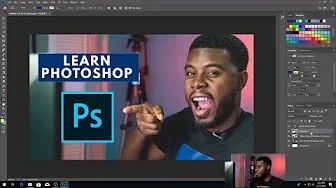
How to Use Adobe Photoshop (Part 1) Graphic Design Tutorial for Beginners
in Design
5.00
(1 Ratings)
Created by
Robert Ransdell
About this course
How to Use Adobe Photoshop
Adobe Photoshop is a powerful tool for creating and editing images, graphics, and digital art. Here’s a step-by-step guide to help you get started:
1. Open Photoshop and Set Up Your Workspace
- Launch Adobe Photoshop on your computer.
- Familiarize yourself with the interface, which includes the menu bar, tools panel, layers panel, and canvas (your working area).
- Customize your workspace by selecting Window > Workspace and choosing options like Essentials, Photography, or Graphic Design.
2. Open or Create a File
- To open an existing image, go to File > Open and browse your computer.
- To create a new project, go to File > New and define the size, resolution, and background of your canvas.
3. Learn the Basic Tools
- Move Tool (V): Move objects on the canvas.
- Selection Tools: Use tools like the Rectangular Marquee, Lasso, or Magic Wand to select parts of an image.
- Brush Tool (B): Paint or draw on the canvas with various brush styles.
- Eraser Tool (E): Remove parts of an image or layer.
- Text Tool (T): Add text to your design.
- Zoom Tool (Z): Zoom in or out for precise edits.
4. Work with Layers
- Layers are essential for non-destructive editing.
- Create a new layer by clicking the New Layer button in the Layers panel or going to Layer > New > Layer.
- Rename layers for organization by double-clicking the layer name.
- Adjust layer visibility or opacity using the controls in the Layers panel.
5. Edit Your Image
- Crop and Resize: Use the Crop Tool (C) to remove unwanted parts of your image. Resize using Image > Image Size.
- Adjust Colors: Use Image > Adjustments for tools like Brightness/Contrast, Hue/Saturation, or Levels.
- Retouch: Use the Clone Stamp (S) or Healing Brush (J) to fix blemishes or remove unwanted elements.
6. Add Effects
- Apply effects like shadows, glows, or strokes by double-clicking a layer to open the Layer Style dialog.
- Explore filters under Filter > Filter Gallery to add artistic effects.
7. Save and Export
- Save your project as a Photoshop file (.PSD) to preserve layers: File > Save As.
- Export for sharing by choosing File > Export > Export As, and select formats like JPEG, PNG, or GIF.
Tips for Success
- Use shortcuts to speed up your workflow (e.g., Ctrl+Z for Undo).
- Experiment with tools and features to build confidence.
- Learn advanced techniques like masking, blending modes, and adjustment layers as you progress.
Requirements
Have a computer with Ps
Be ready to learn an insane amount of awesome stuff
Prepare to learn!
FAQ
Is it a supported course?
Yes, you can get in touch with the instructor using the support system.
Can I have a private meeting with the instructor?
Yes, you can reserve a 1 to 1 meeting with the instructor using the instructor profile.
Comments (0)
How to Use Adobe Photoshop
9 Parts
Creating A New Template
-
Swatches Layer
-
Tools
-
Type Tools
-
Thumbnail
-
Logo
-
Colour Picker
-
Adding a New Shape
-
Conclusion
-

5.00
1 Reviews
Reviews (1)
Cameron Schofield
4 Mar 2022 | 01:13
Reply
It was an excellent course. I hope to see more courses from this teacher in the future.
BLK10
Black Firday Offer
Buy now with a special offer


